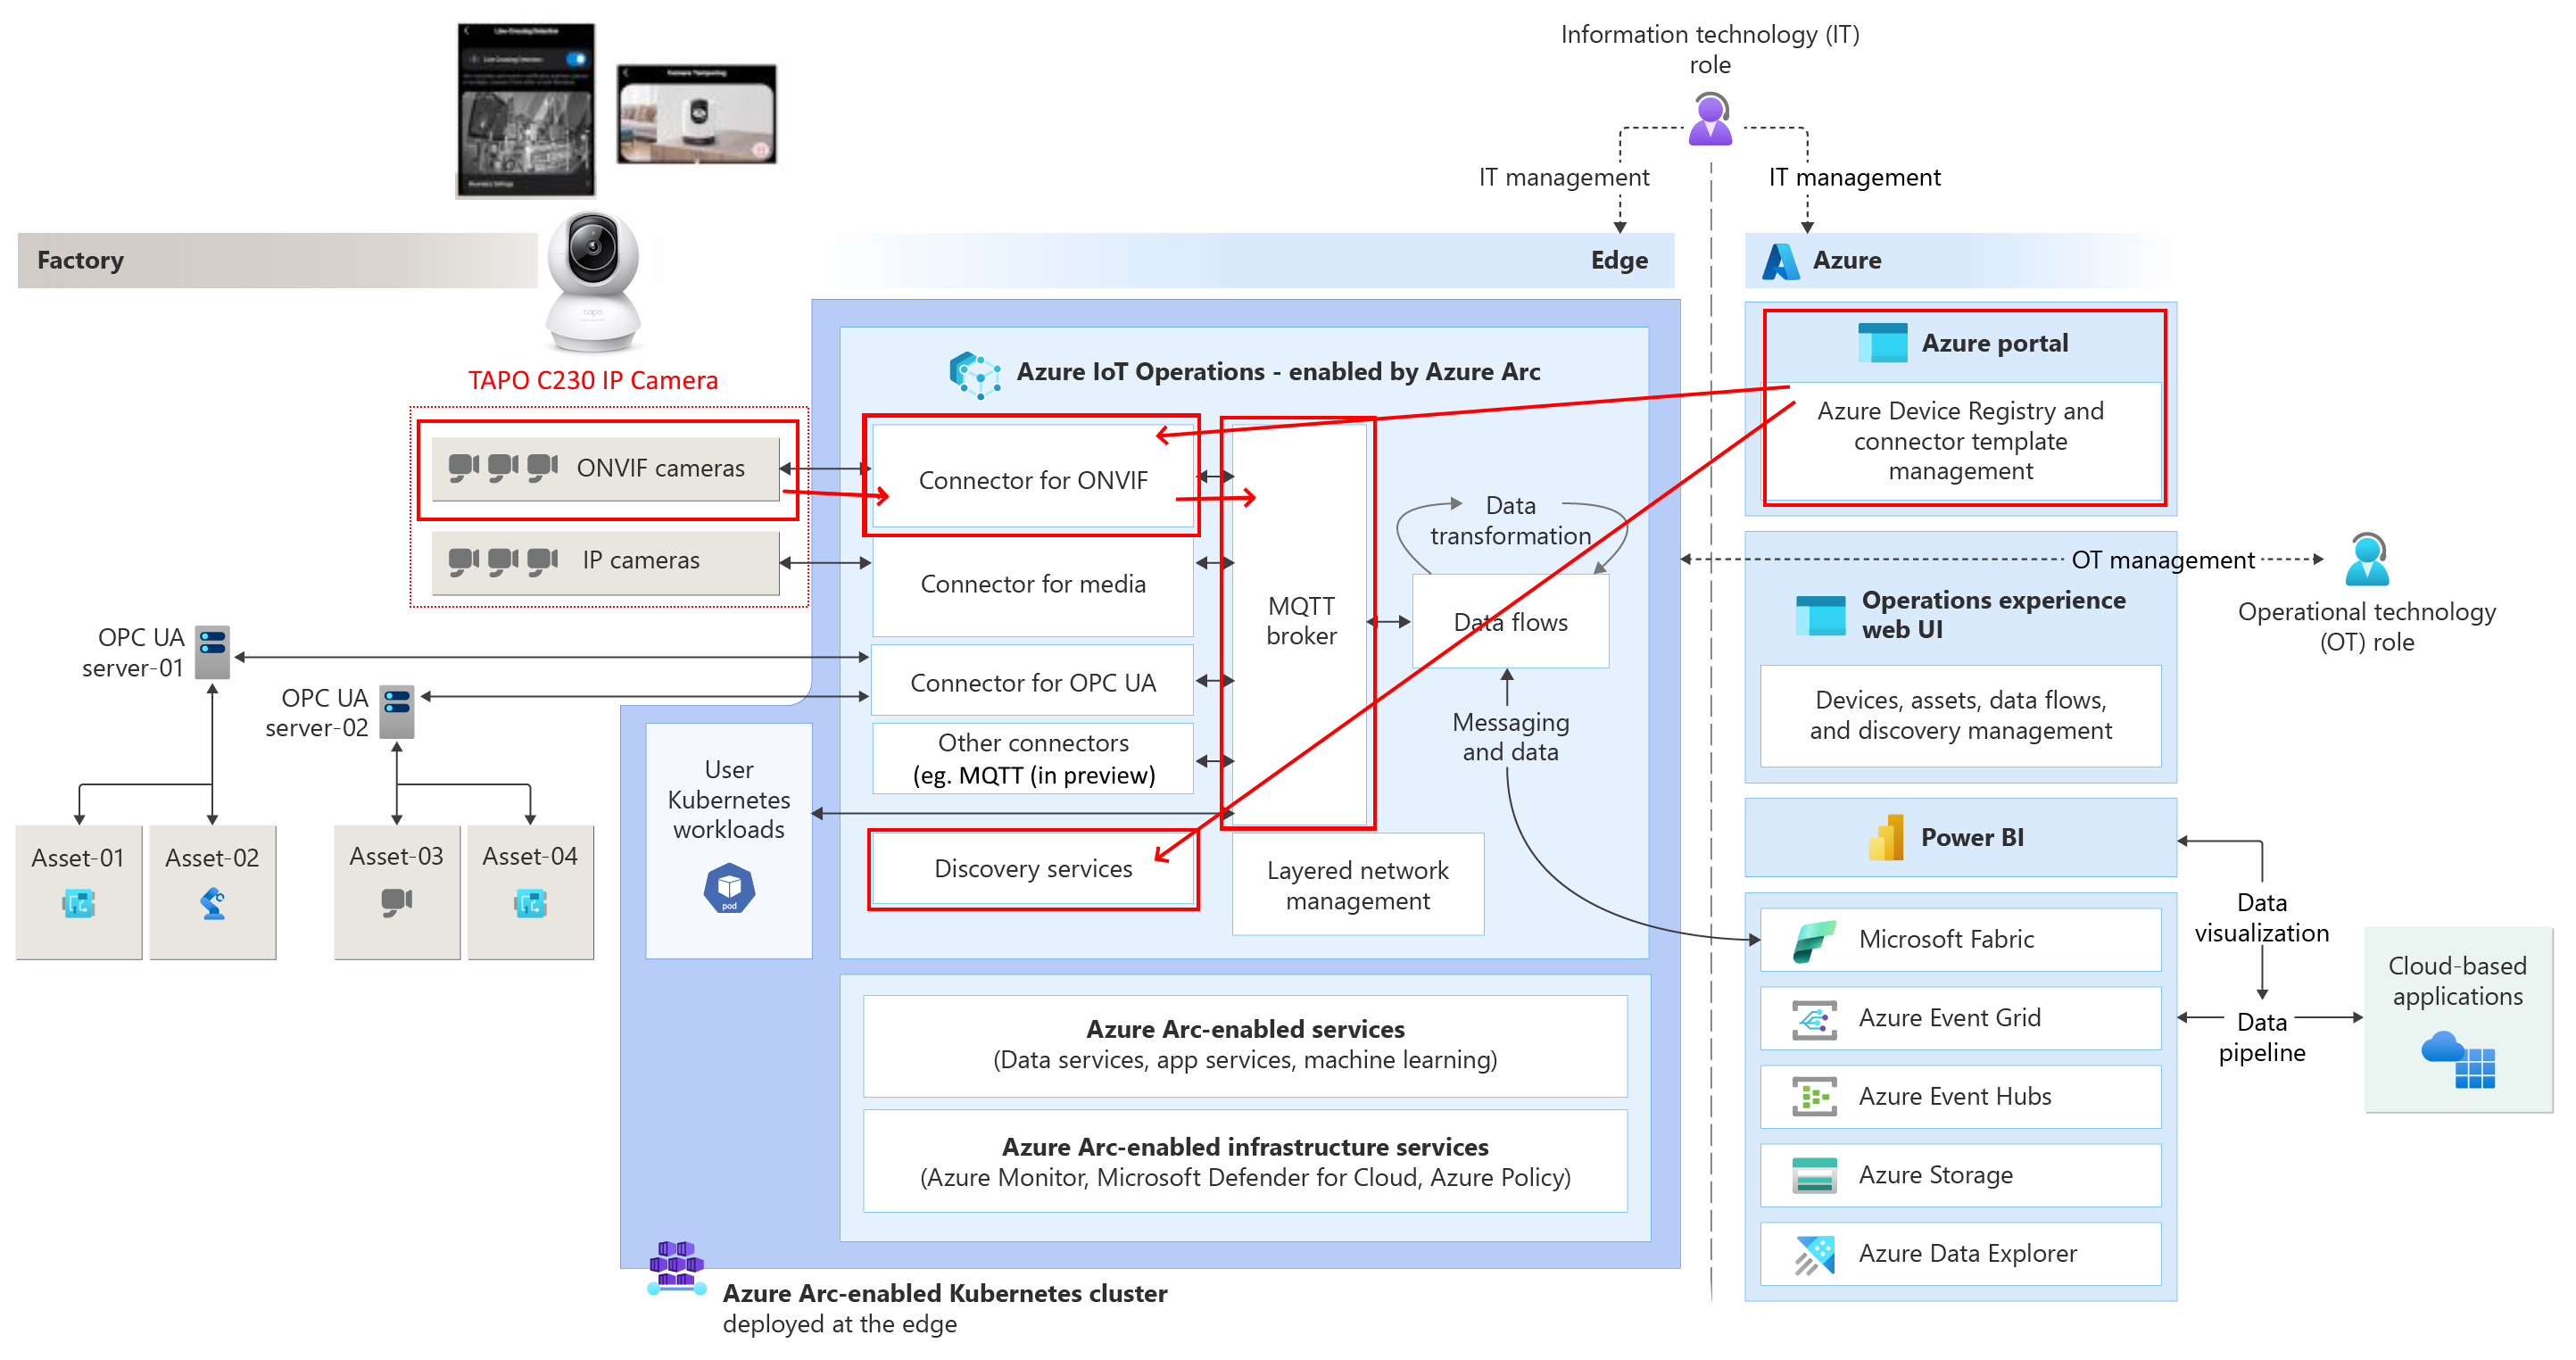
Azure IoT Operations is the Edge platform for Azure IoT, part of Azure IoT vNext (part of the latest Azure IoT stack with other features like the MQTT support for Azure EventGrid Namespaces and Microsoft Fabric Real-Time Intelligence).
It offers a great experience for Edge computing ‘between four walls’, in a factory, etc..
Azure IoT Operations offers advanced features for integrating IP camera images, like the media connector and ONVIF support. In this post, we work with events, taken from Custom Vision.
If you have an IP camera that supports ONVIF and it also supports ONVIF events (like motion detection, person detection, pet detection, line-crossing detection, or camera tampering), Azure IoT Operations can pick up these alerts and forward them over MQTT so you can act on them.
Let’s check out how to do this.
In previous posts, we have seen how we can connect with the local MQTT broker running within Azure IoT Operations using MQTT clients that are operating on the local network, how we use the IoT Operations portal in the cloud to set up data flows on the edge sending data to the cloud including Microsoft Fabric Real-Time Intelligence, how we can send commands from the cloud to the edge via the MQTT broker in EventGrid, and how to create Assets based on the OPC-UA protocol. We have also seen how to run the TIG stack on Azure IoT Operations. And we have seen how we can connect with local LoRaWAN sensors and work with custom vision.
This is part twelve of a series of blog posts about Azure IoT Operations:
- Azure IoT Operations: (in)secure MQTT broker authentication
- Azure IoT Operations: Microsoft Fabric RTI Eventstream dataflow
- Azure IoT Operations: Sending commands via EventGrid MQTT
- Azure IoT Operations: Reading OPC-UA server tags
- Azure IoT Operations: Monthly releases
- Azure IoT Operations: Event Hub telemetry and commands
- Azure IoT Operations: Local dashboard based on TIG stack
- Azure IoT Operations: control a signal tower via Microsoft Fabric RTI feedback loop
- Azure IoT Operations, building a custom module using the SDK
- Microsoft Fabric RTI: Integrating public and private LoRaWAN sensors
- Azure IoT Operations: Deploying custom vision
- Azure IoT Operations: Act on ONVIF camera events
- No-Code Dataflow transformations via message schema inferencing
- Azure Arc Connected Machine agent, automatic update
- Azure IoT Edge and Azure IoT Operations, the Edge of Tomorrow
- Consuming southbound HTTP/Rest and SSE endpoints using Azure IoT Operations
Prerequisites
In this post, we are going to connect an IP camera with ONVIF support as a device to Azure IoT Operations.
If you want to follow along, have an Azure IoT Operations cluster deployed on an Edge device on a local network.
You also need an IP camera with ONVIF support. I will use a Tapo camera like the Tapo C230 (I have several cameras of this brand installed). After providing a fixed IP address to the camera and creating a camera account (so RTSP and ONVIF protocol support can be managed), you probably need to enable the camera events to meet your needs.
Note: Check the documentation about ONVIF compliance. Make sure the right profiles are supported (Profile S for basic video streaming, Profile T for advanced video streaming).
As you can see, this Tapo IP camera supports a large list of useful events (and less useful events; I do not own a dog):
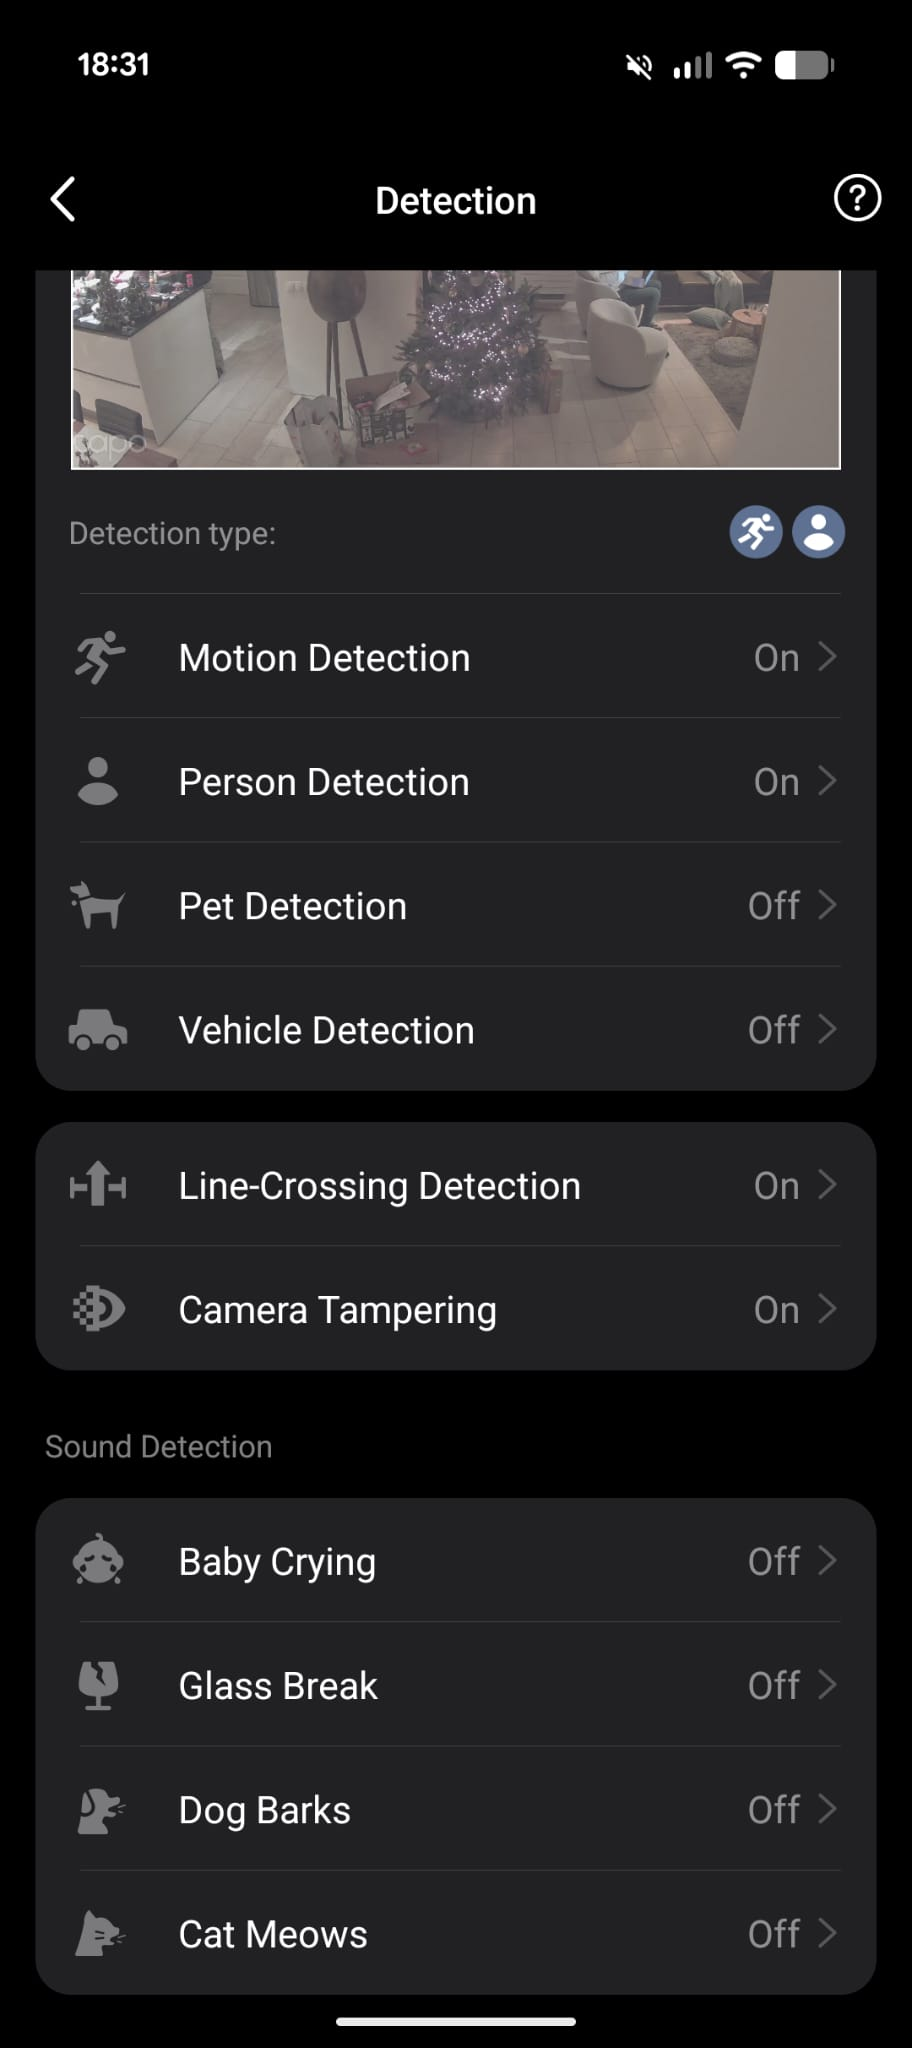
Note: Not all events are activated by default; some must be turned on.
We will see these events at the end of this post, appearing again.
For your Azure IoT Operations instance, you need to enable resource sync rules by running the following command on your Azure IoT Operations instance:
az iot ops enable-rsync -n <my instance> -g <my resource group>
This command also sets the required permissions on the custom location.
Find an Azure CLI prompt (eg. in the Azure portal) and execute it.

Once this is done, you are good to go.
In this post, we look at the ONVIF events. Azure IoT Operations also supports PTZ (pan, tilt, zoom) control, but for now, we will only react to the events mentioned.
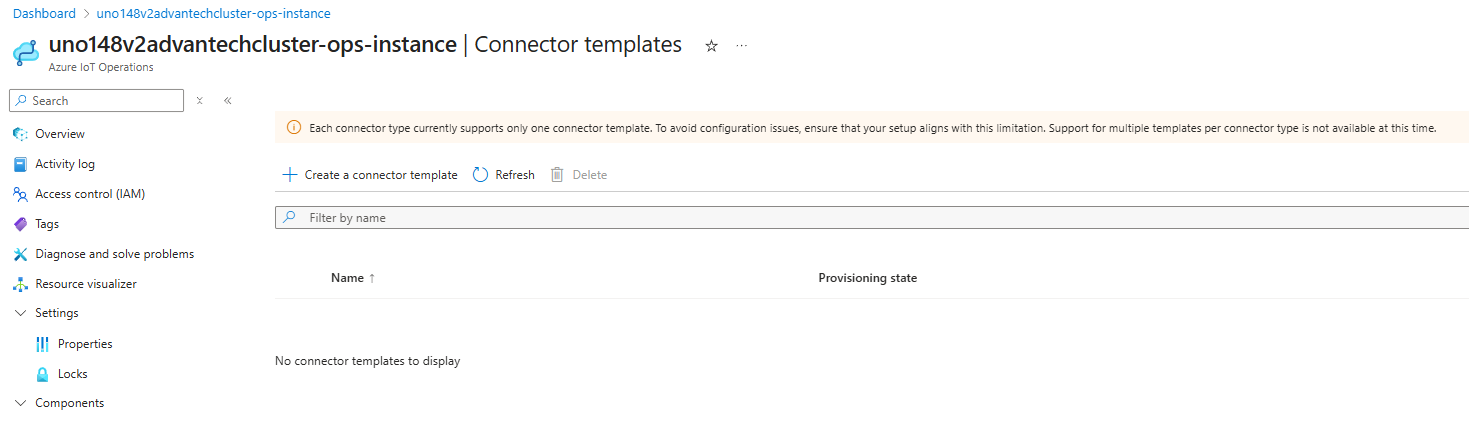
Deploying connector templates
To connect Azure IoT Operations to devices like an IP camera, we will make use of ‘connectors’.
If we want to make use of Azure IoT Operations connectors, for eg. ONVIF and video media (like RTSP), we need to activate them by loading the connector templates first.
Notice that my IP camera supports both ONVIF and RTSP, so it’s recommended to load both connector templates in the Azure portal UI.
Why both if we are only interested in ONVIF? During my research, the discovery of the device in a later stadium was blocked and unresponsive until I added that second (vision, RTSP) template. Although the media connector is not needed for this ONVIF exercise, we probably want to use that media connector in a future blog post. So, I recommend adding both.
Let me show how the ONVIF connector template is added. Then, you can add the media connector template.
ONVIF connector template
Open the connector templates page within the Azure IoT Operations instance. Probably, no template is active yet:
A six-step wizard is shown where the right ONVIF connector template must be chosen in the first step:
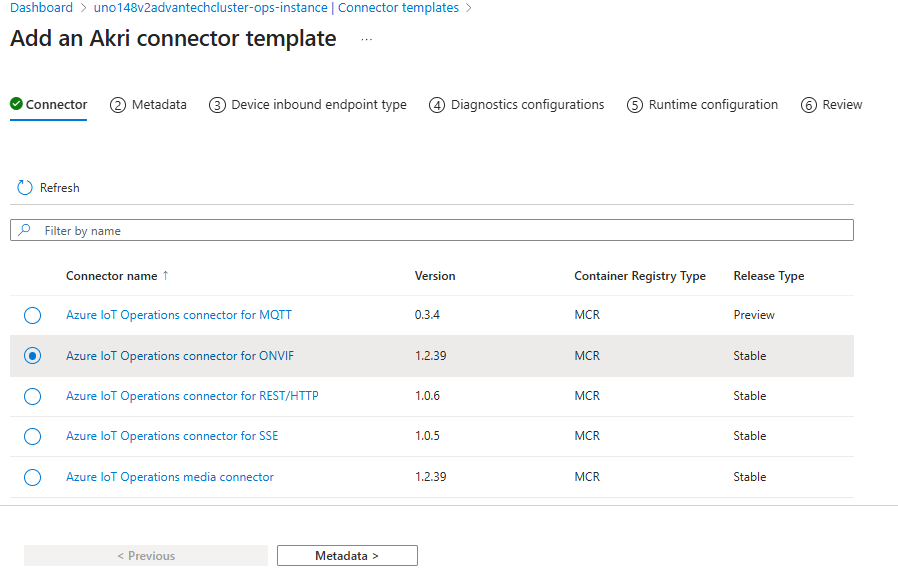
Select that ONVIF connector and move to the Metadata page.
I changed the template name a bit to relate it to my AIO machine:
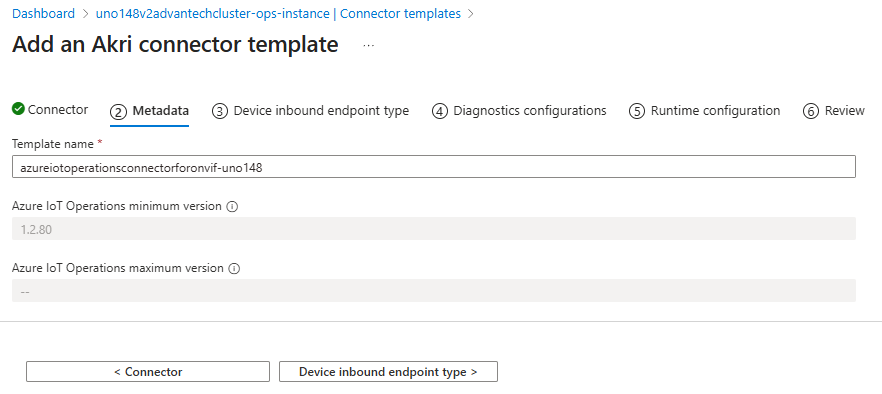
Note: As seen in the portal message, we can only add once a certain type of template. So keep an eye on the settings; these are valid for all assets, based on that template.
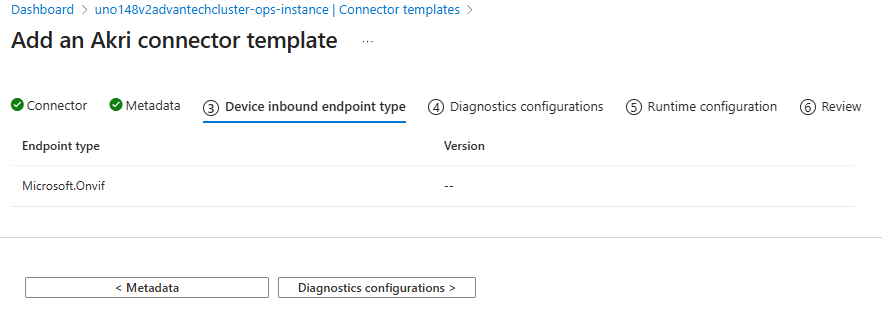
We keep the device inbound endpoint type as-is:
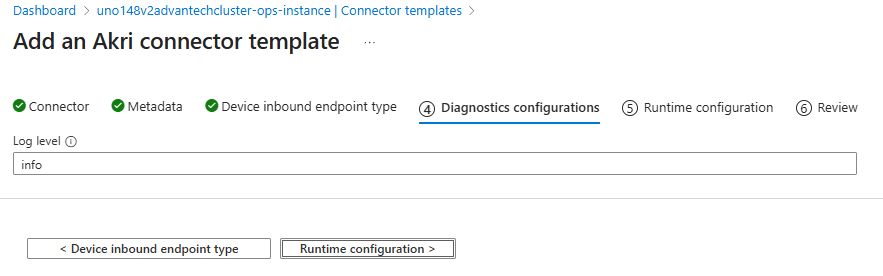
We keep the diagnostics configuration as-is:
We keep the runtime configuration as-is:
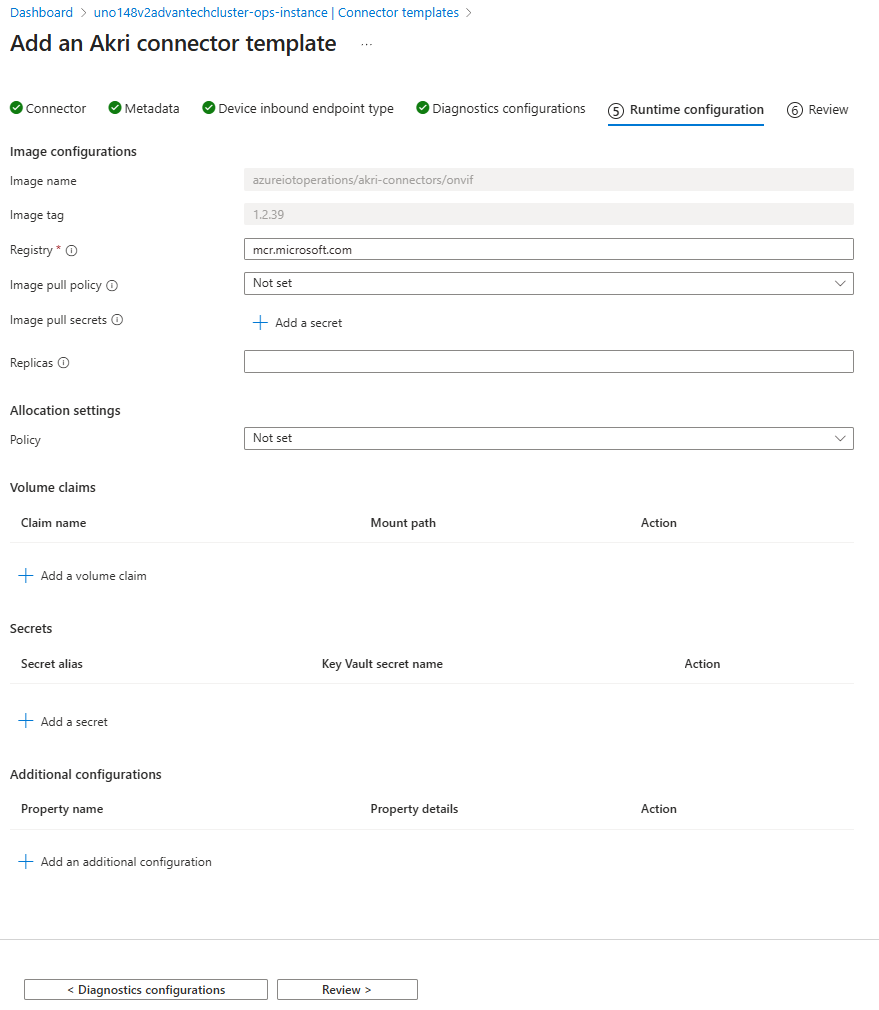
As you can see, the ONVIF connector is a predefined AKRI connector. It’s based on a Docker container/Kubernetes pod.
Review the settings:
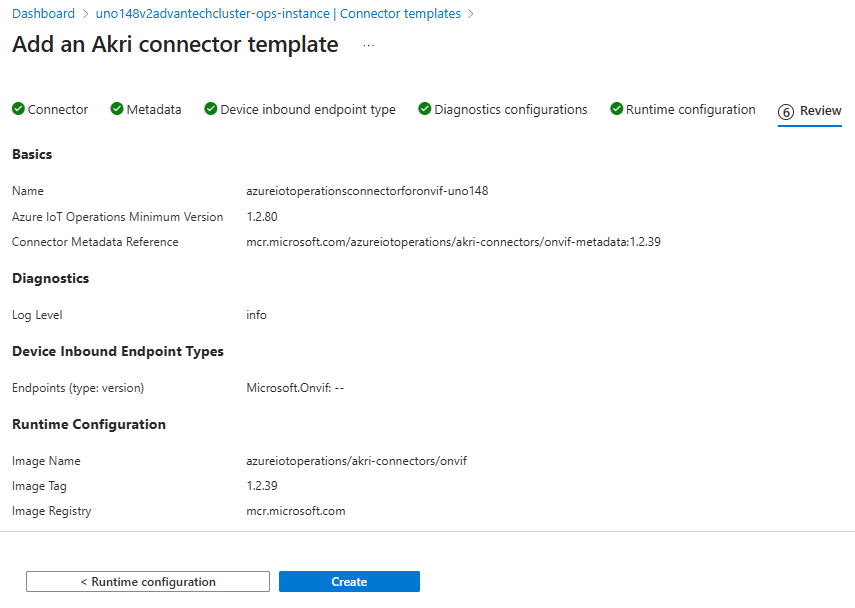
Create the template.
The template is accepted for addition:
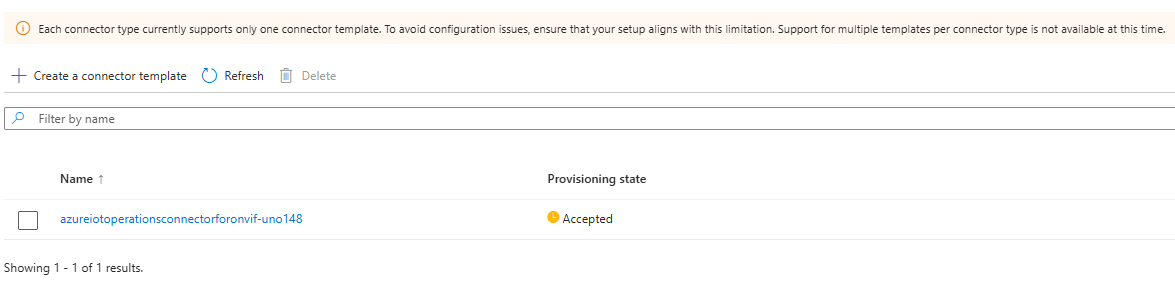
The ONVIF template is added:

This is the first and most important template we need for this post.
Media connector template
As stated before, adding the media connector is recommended.
Please add the Azure IoT Operations media connector yourself.
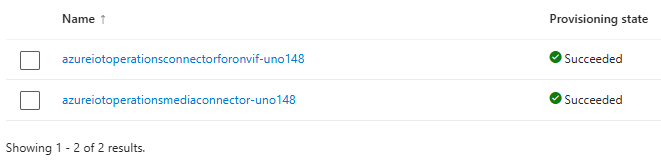
Remember, we added this second template for convenience. And it helped me during my research to do a proper device discovery.
Now, both templates are added. We can focus on ONVIF devices for capturing alerts, so we can add assets via the device discovery option.
Adding a device with an ONVIF endpoint
The previous step could be performed by a Cloud engineer. The next steps are typically performed by an IoT engineer. Open the IoT Operations experience and add your IP camera as an Azure IoT Operations device with an ONVIF endpoint.
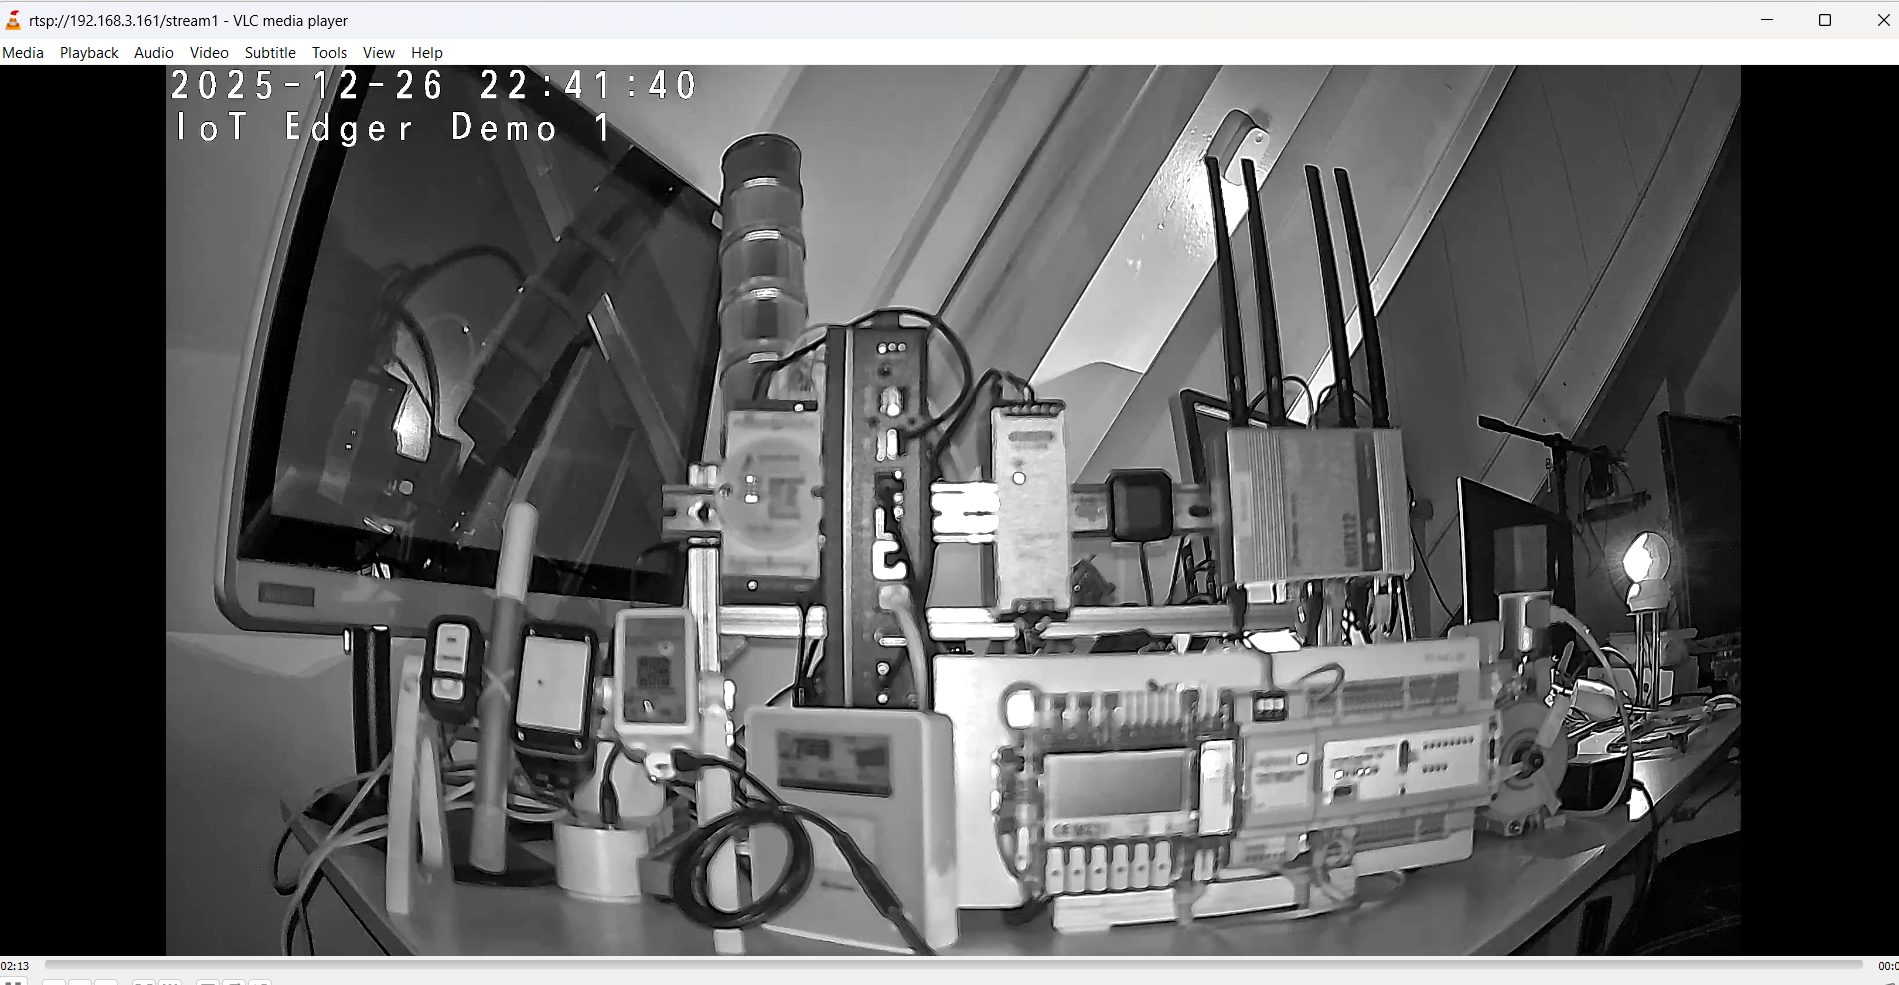
The IP camera I use exposes a video RTSP stream at rtsp://192.168.3.161/stream1. This stream is secured using that camera account (a name and password).
The stream looks like this when opened in VLC Media player:
So, let’s add this IP camera as a device with an ONVIF endpoint.
We start by adding a device within the IoT Operations experience:
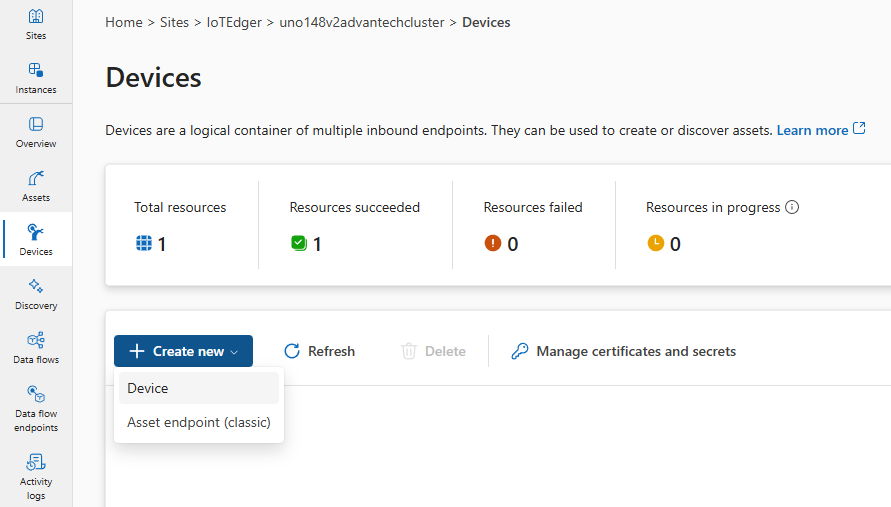
This opens a three-step wizard:
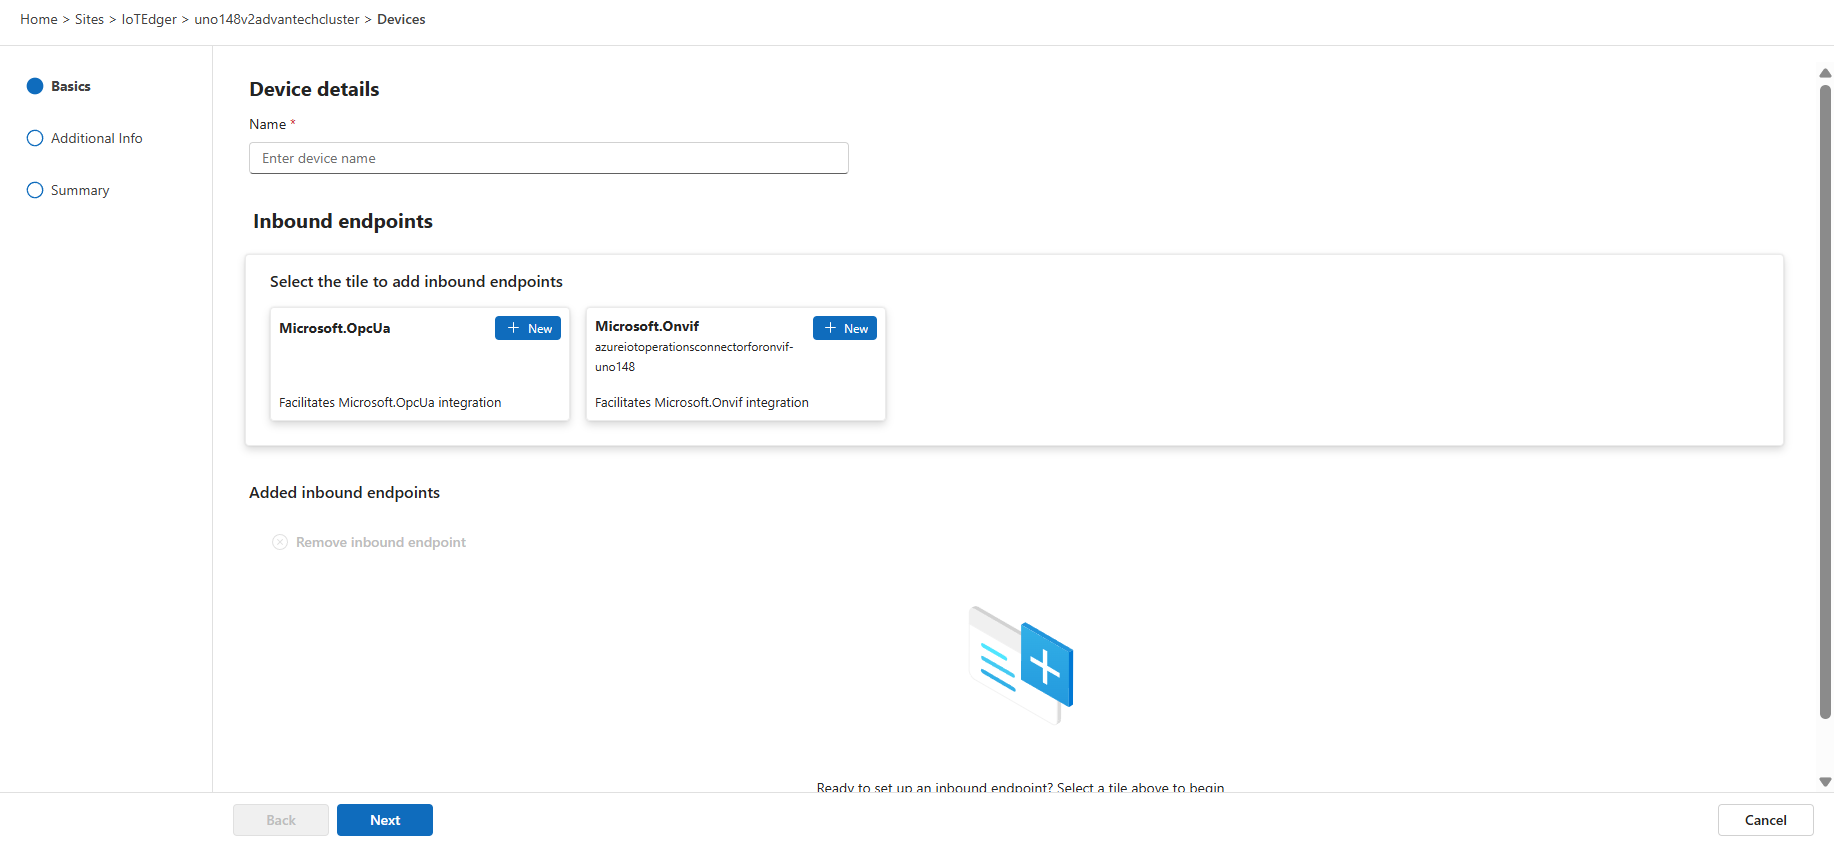
First, in this step, we provide a proper name (1), and then we will add the ONVIF endpoint details via the ONVIF selection (2) :
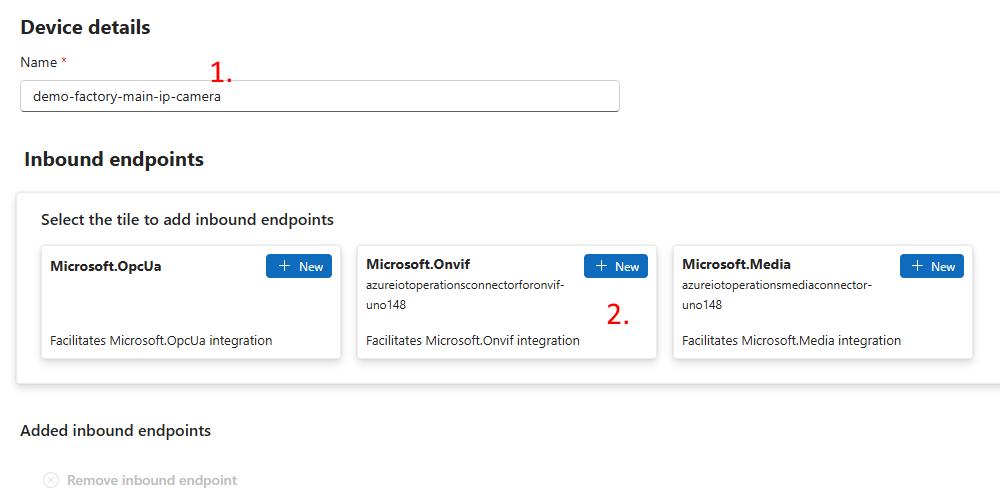
Notice the server URL endpoint of our TAPO IP camera in the details:
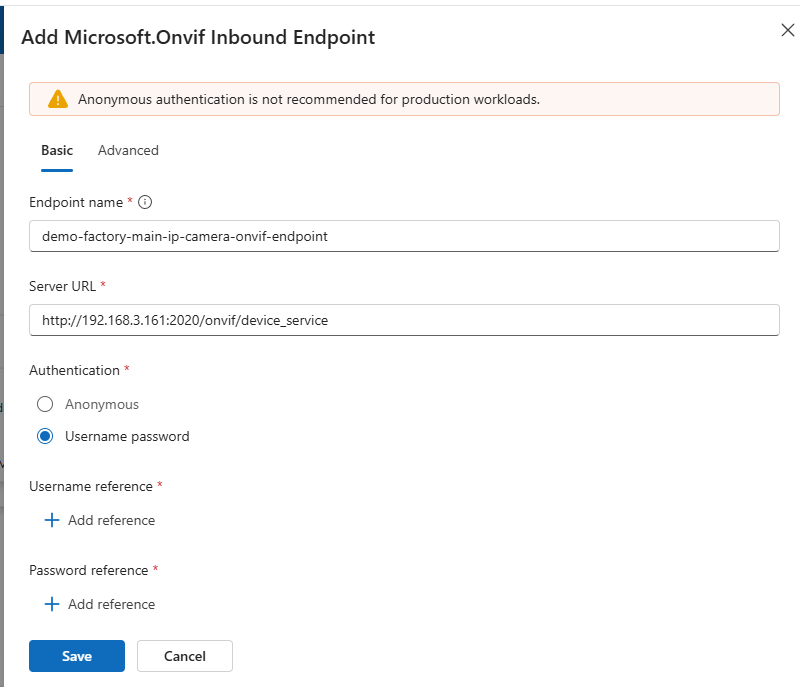
Check the documentation of your camera for your own camera ONVIF endpoint specifics.
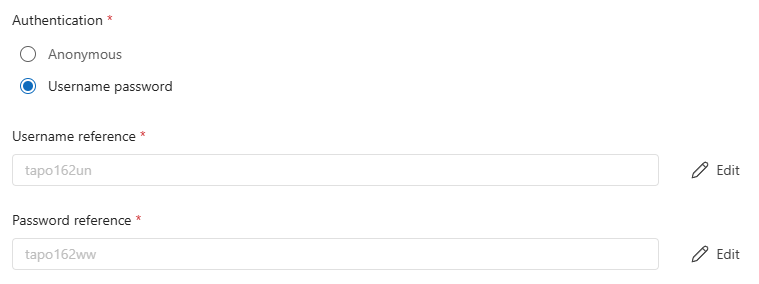
Notice that I added the camera account, needed as authentication for this ONVIF endpoint (as it works for RTSP too). Use both ‘Add reference’ buttons to add the name and password.
In that ‘add reference’ dialog, you could add new credentials:

You have seen this in the past already when I played with OPC-UA.
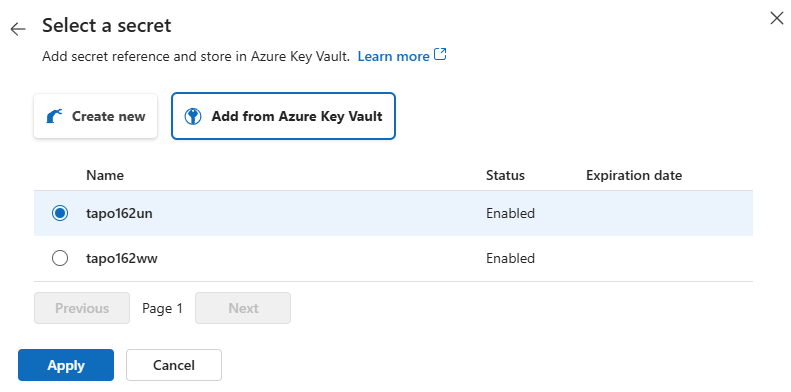
Here, I show how to add the name and password via the key vault because these were added in the past already:
I can simply select the existing ones:
Both are added now to the Device endpoint details:
Depending on your device’s settings, it could be that extra settings are needed for authentication.
There is an Advanced tab related to those additional security settings:
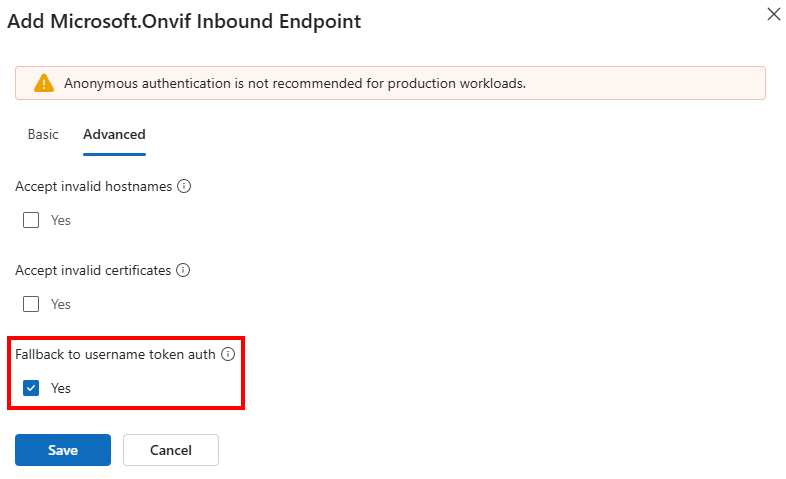
I found out that connecting the TAPO IP camera endpoint only works when this Fallback to username token authorisation setting is enabled.
We are all set. Save these inbound endpoint settings on the Basics page.
On the next page, optional custom properties can be added:
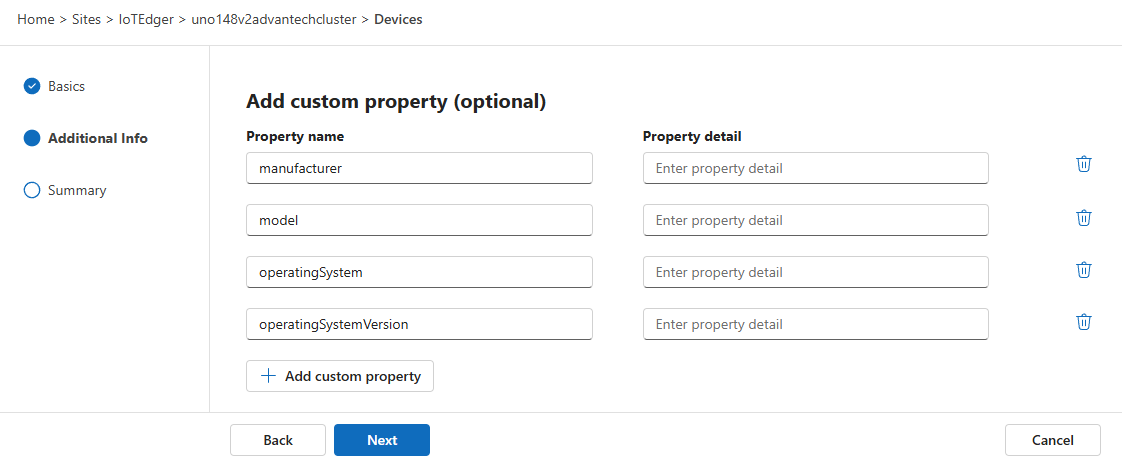
I leave it up to you to add those.
On the last page, a summary is shown with device details and the inbound endpoint we added:
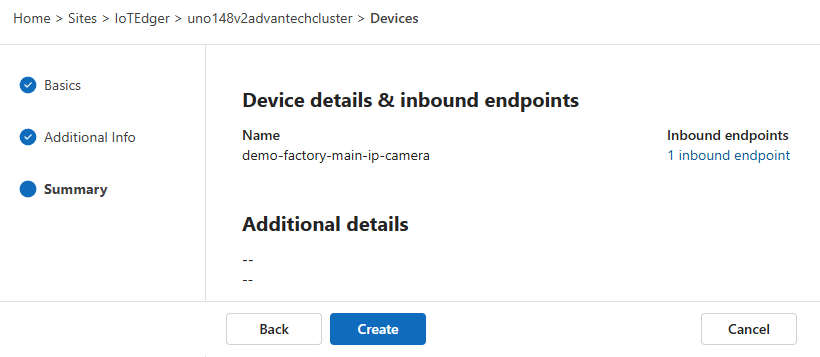
Create the device representing your IP camera. This takes a moment. Refresh the page once the device is created and synchronized:
Let’s discover the assets behind this endpoint via ‘Discovery’.
Asset discovery
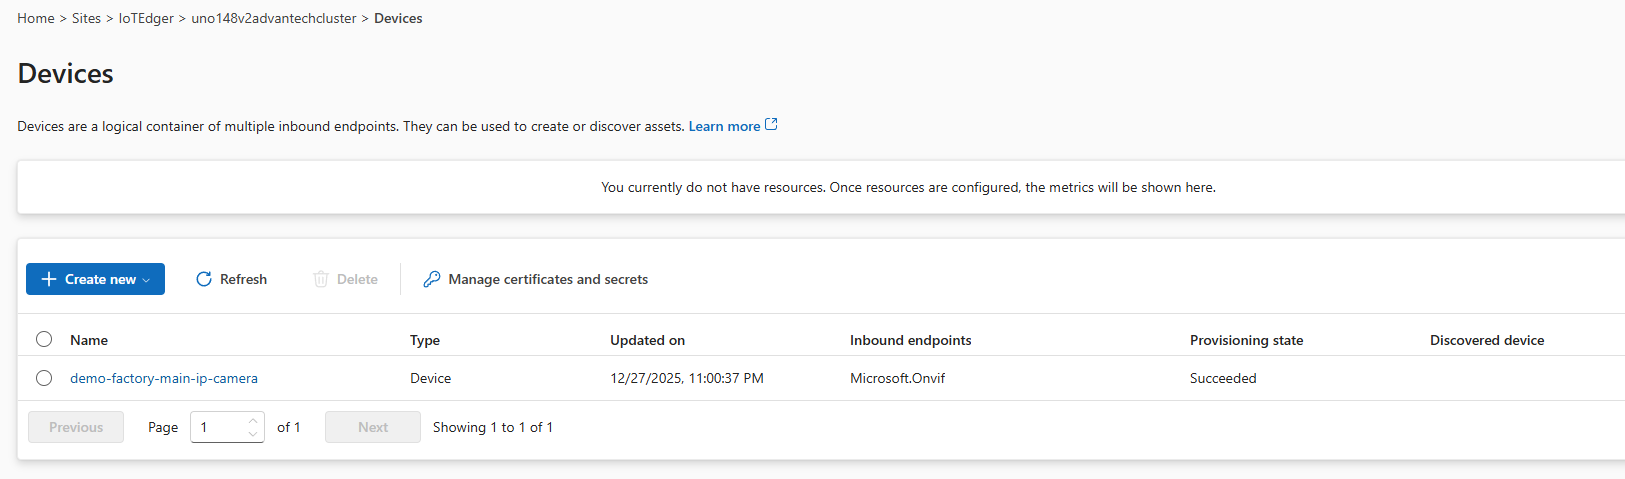
So, we have created an IP camera device with an ONVIF endpoint on the Azure IoT Operations edge device via the IoT Operations experience.
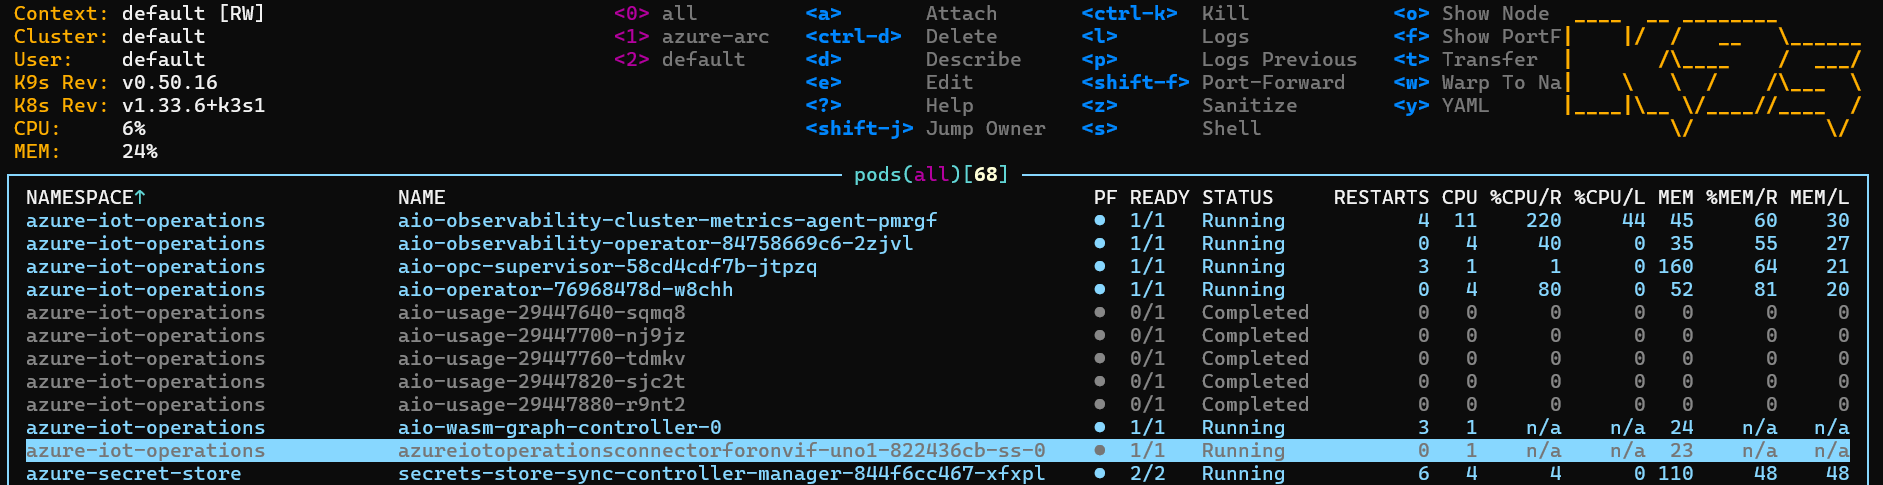
Before we continue with configuring an ONVIF asset, let’s check the edge first.
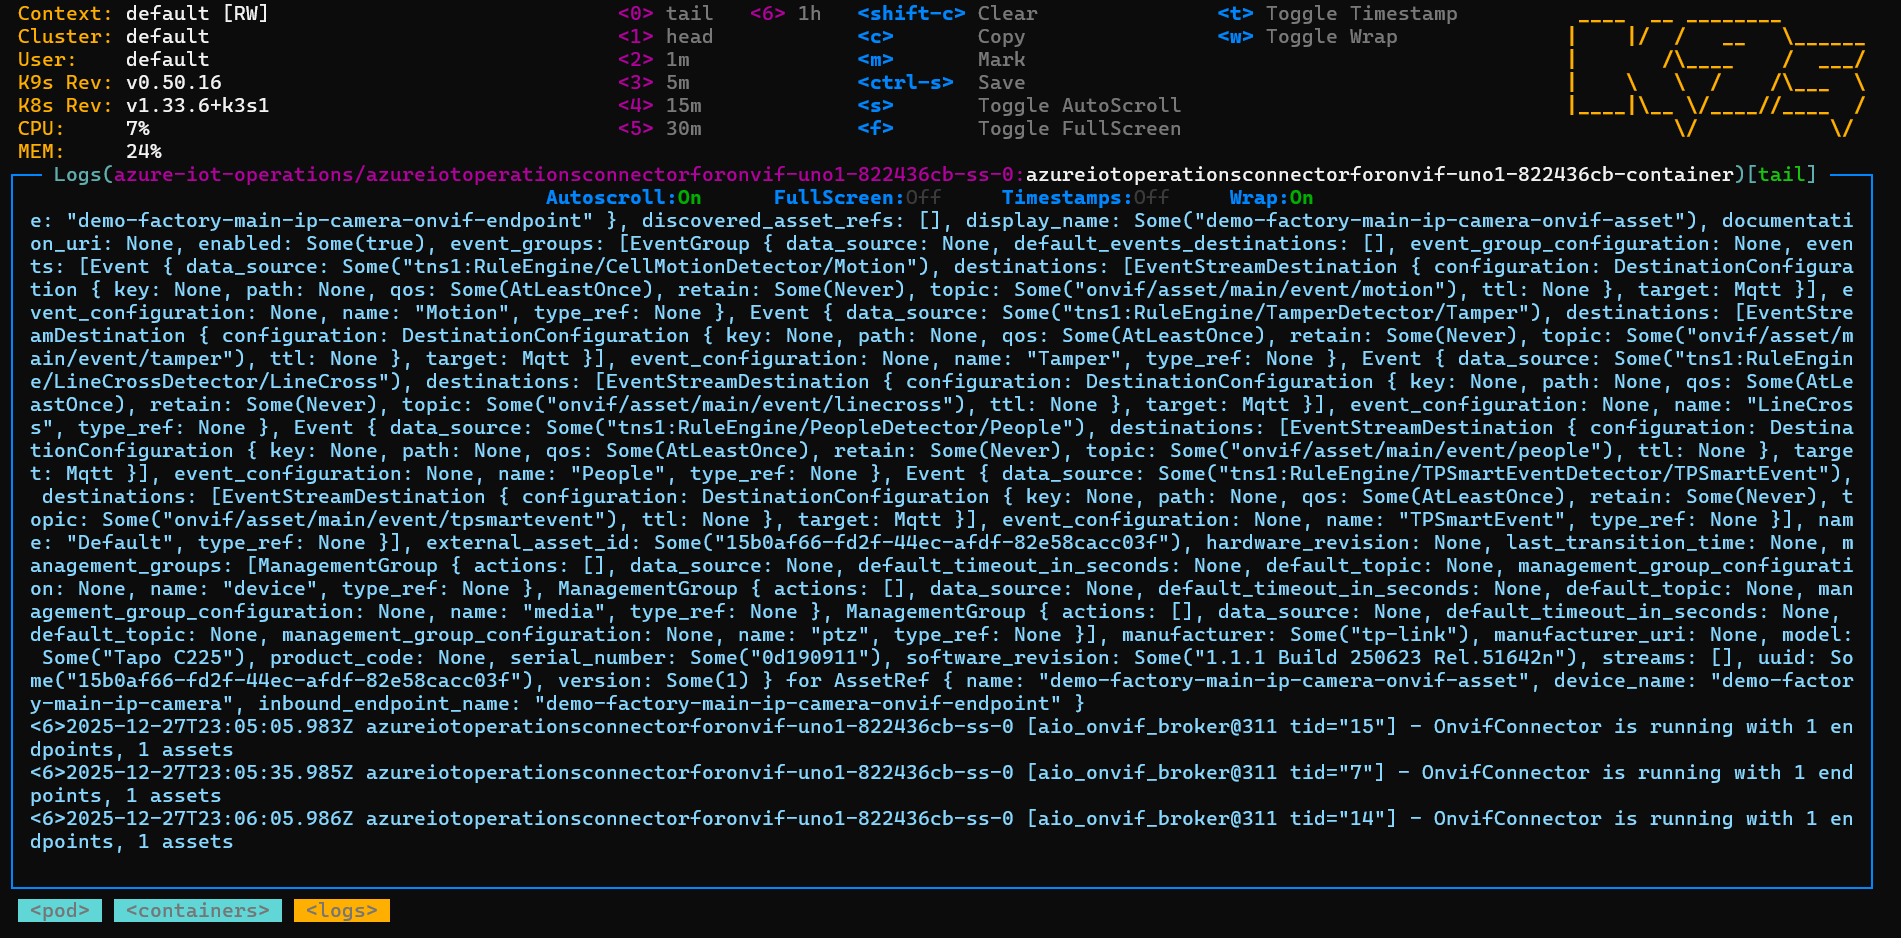
Using K9S, we can see an ‘azureiotoperationsconnectorforonvif’ pod is running on our edge device:
Check the logging of that pod. It should look like this:

If the credentials provided to the endpoint were correct, you should read: “OnvifConnector is running with 1 endpoints, 0 assets”. We will fix that ‘0 assets’ in the next step…
Otherwise, Azure IoT Operations fails to connect:

If this is what you see, check back with the Device endpoint authentication and fix the credentials.
We move over to the discovery page.
See that a ‘potential’ asset has been discovered on the ONVIF endpoint of your device:
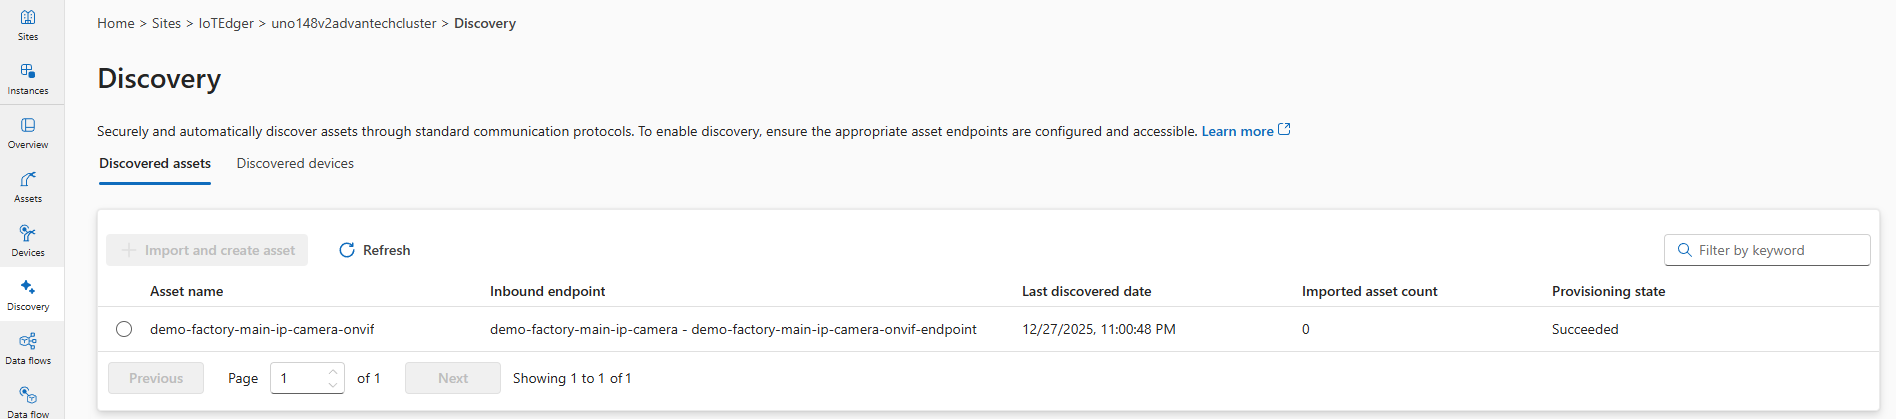
This discovery must be turned into an actual asset to actually use it.
It must be imported as asset. From it, an actual asset must be created:
Asset creation
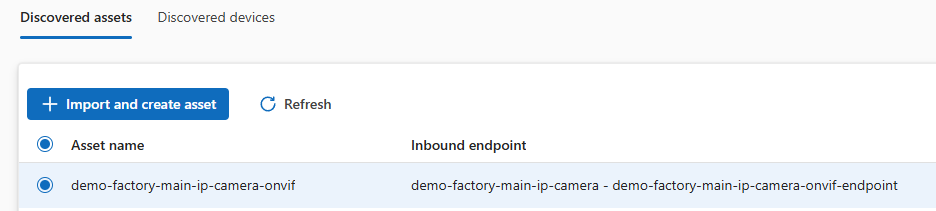
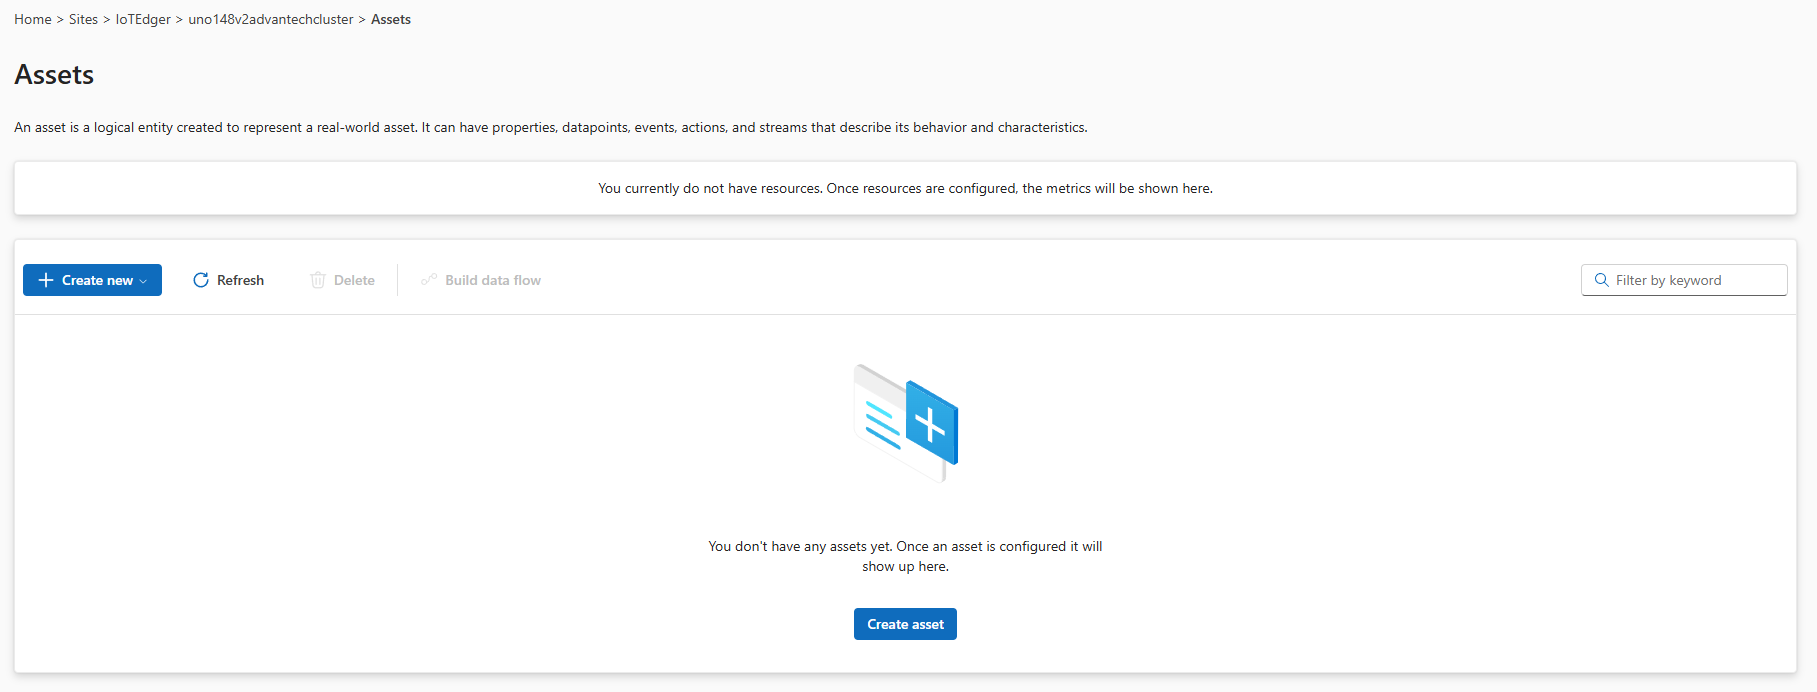
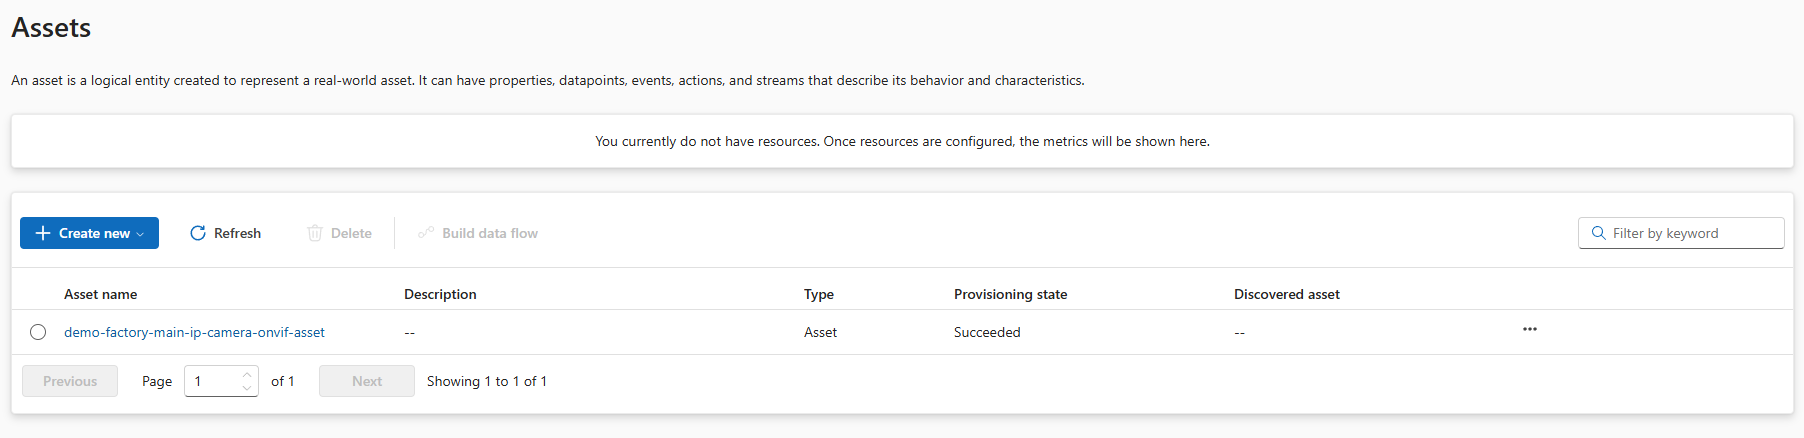
Notice that the Assets page itself does not show any assets yet; that ‘discovered asset’ is not yet a ‘created asset’:
Note: At this moment, ONVIF and Media assets can only be added via that discovery page.
So, on the Discovery page, select the radio button of our ‘discovered asset’ and hit the import and create asset’ button.
A new wizard is shown. This is where the ONVIF events are configured for our asset:
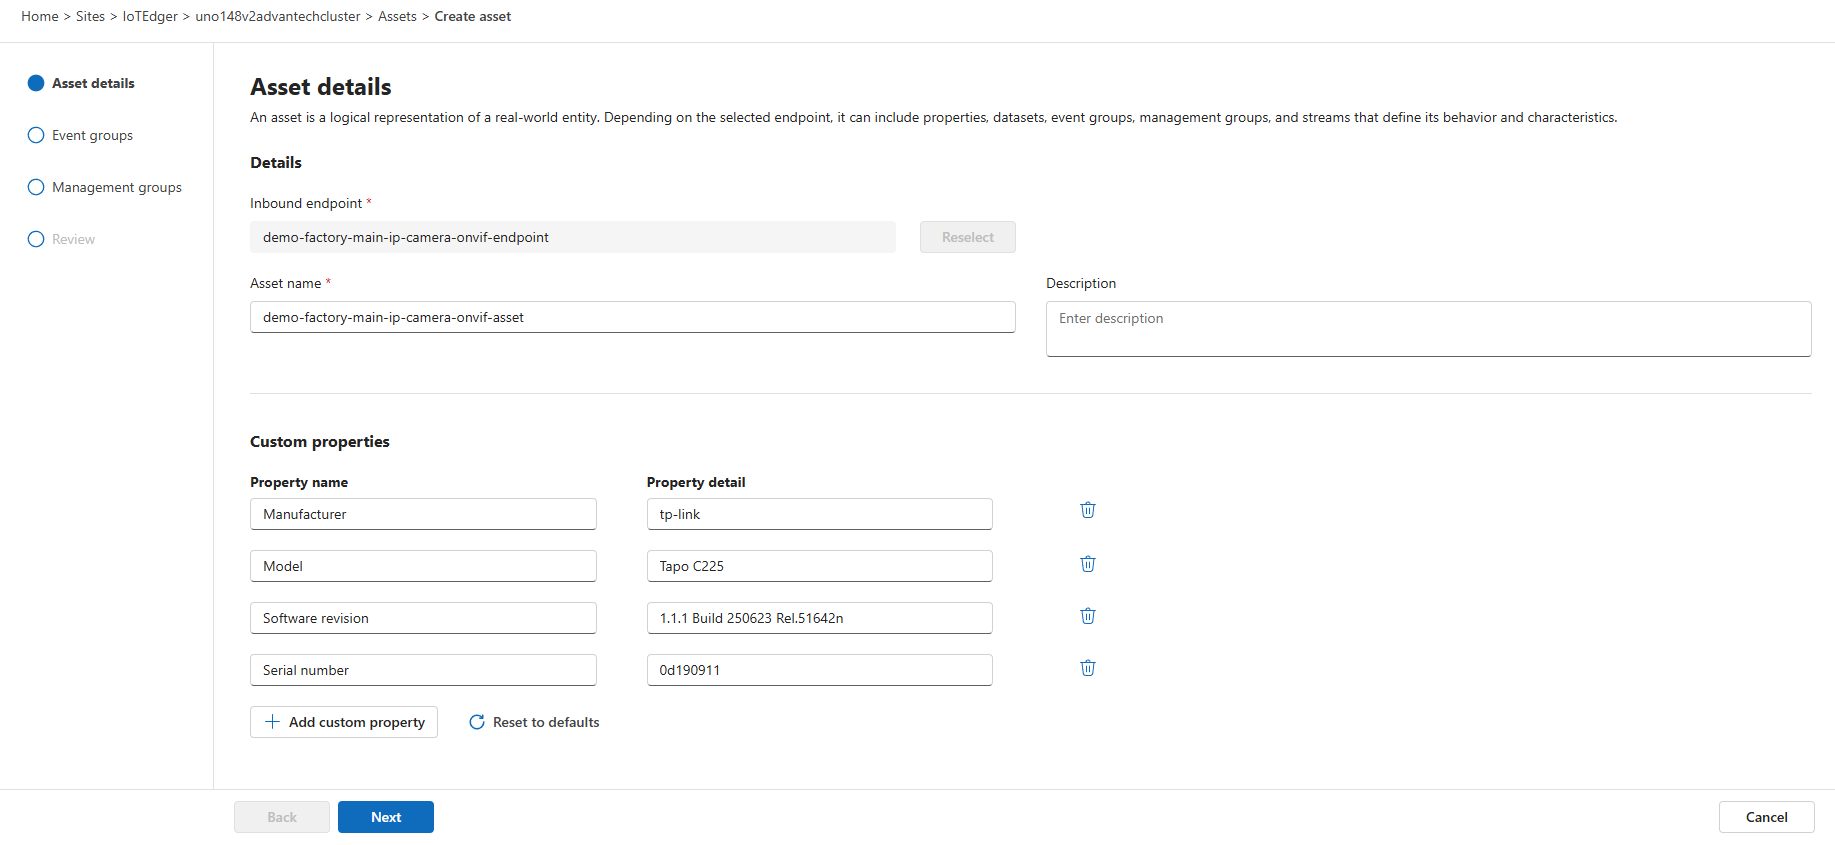
On the first page, check out the properties. These are read from the IP camera via the authenticated ONVIF endpoint, so our edge device is connected to the IP camera. You can add additional properties if needed.
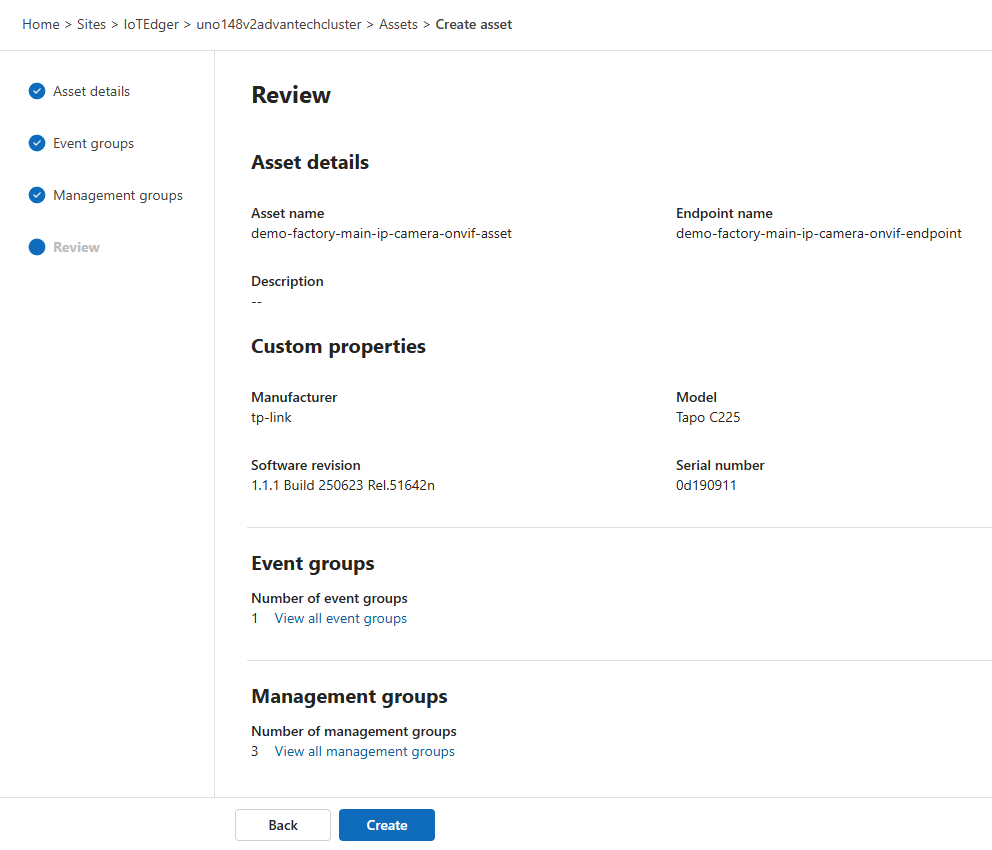
Give the asset a proper name like ‘demo-factory-main-ip-camera-onvif-asset’.
On the next page, a default event group is shown having five event(names):

We do not need to add a separate event group to access the IP camera standard events as seen at the top of this post. The default event group covers them all.
The number of event(names) found (five) in the default event group is a link. Just click on that ‘number’ link:
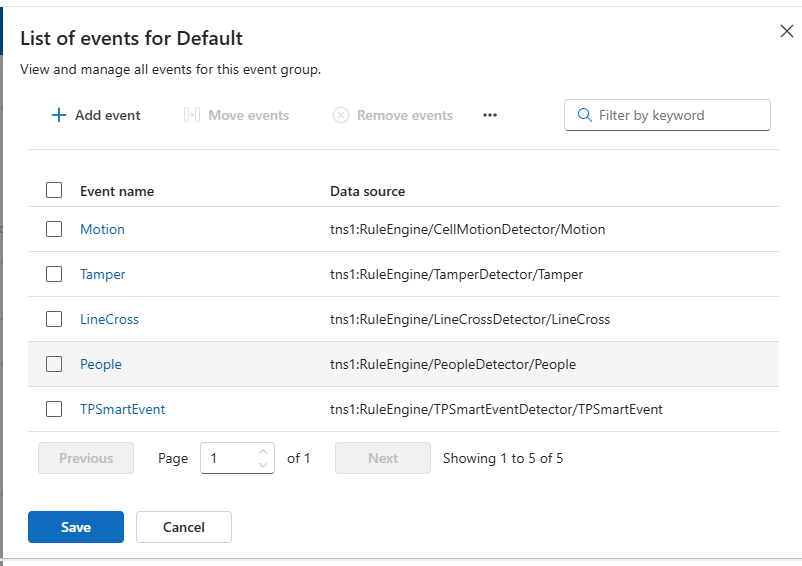
Read from the authenticated ONVIF endpoint, a list of (predefined) event names is shown.
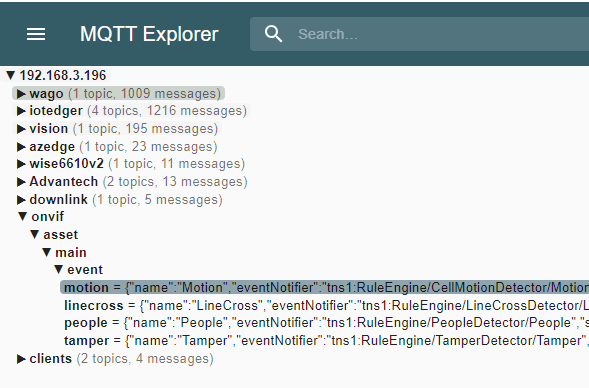
What we will do is connect each of these event names to a separate topic on the Azure IoT Operations local MQTT broker.
Notice that we can skip adding extra events via ‘Add event’.
In this case, I select the Motion event name:

Set the MQTT destination topic to ‘onvif/asset/main/event/motion’ (as a suggestion; you can define your own special topic):
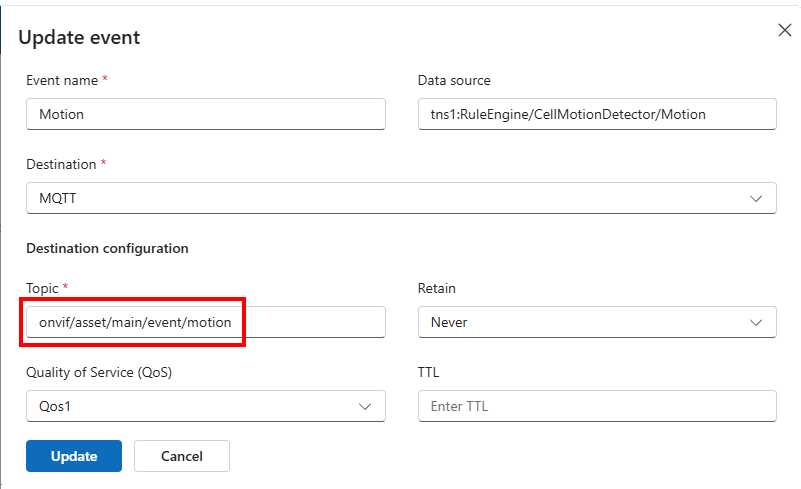
See that the name and data source are already filled in, taken from the endpoint.
Click Update to update the event(name).
Repeat this for the other events:
| Motion | onvif/asset/main/event/motion |
| Tamper | onvif/asset/main/event/tamper |
| LineCross | onvif/asset/main/event/linecross |
| People | onvif/asset/main/event/people |
| TPSmartEvent | onvif/asset/main/event/tpsmartevent |
Once all five event(names) have their own MQTT topic, save these default events on this page.
The next page is all about management groups:
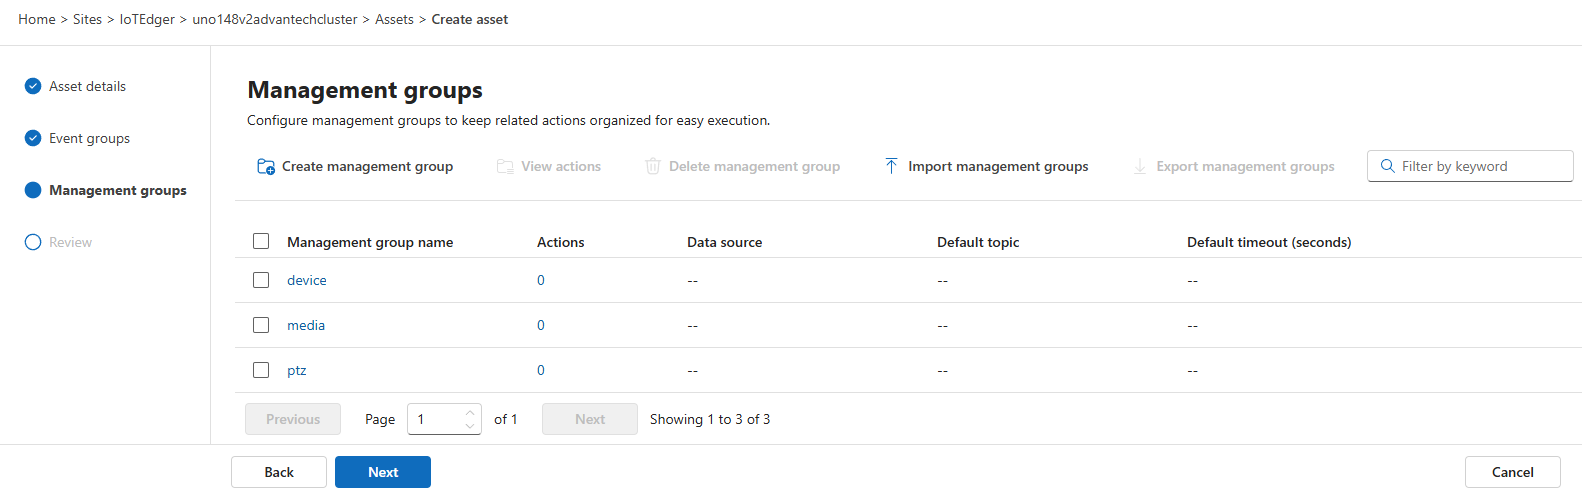
On the Management groups page, we should be able to configure the actions, such as pan, tilt, and zoom, that you want to use to control the ONVIF camera.
Note: The documentation is sparse. There is this GitHub sample, but in my opinion, it’s not helpful. I need a clear understanding of the message request and response formats. If you know what the ONVIF message format should look like, for eg. pan, tilt, or zoom actions, leave a comment below in the comments.
We leave that management group tab as-is.
Finally, review the summary and create the asset:
Refresh the Assets page once our asset is created and synchronized with the edge:
In K9S, we see that the asset is now synchronized on the edge:
We are now able to collect ONVIF events and turn them into value via the MQTT broker.
Acting on ONVIF events via MQTT
Let’s have some fun with the IP camera actions.
TAPO cameras come with a decent app for your phone so you can see what’s happening in front of the camera. If camera events are triggered, these event notifications appear in that app.
We should see the same event notifications arrive in the local MQTT broker too, as MQTT messages!
I was able to test four different events:
Note: The ‘TPSmartEvent’ events are not triggered. I leave it up to you to play with them.
The ONVIF event notifications now appear in the local MQTT broker. So, therefore, it’s simple to act on them by adding a data flow, for example, to Microsoft Fabric or creating a local feedback loop to an actuator that listens to the same broker.
Motion event
The Motion event JSON messages look like this when any motion is detected by the camera:
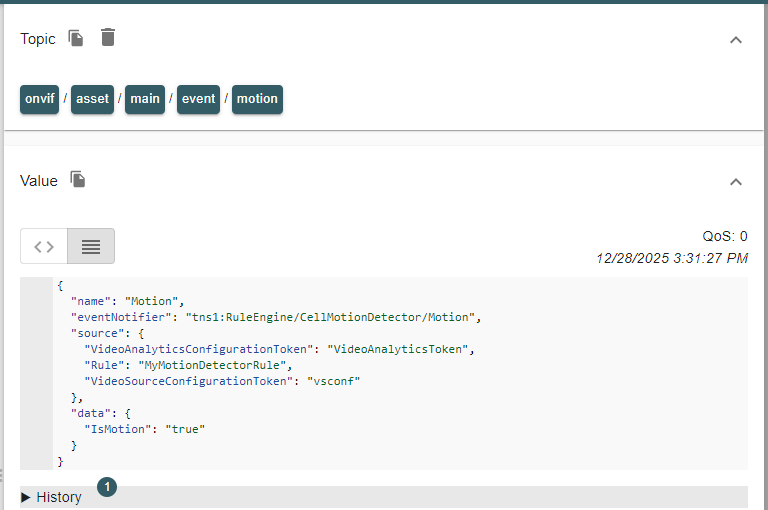
Notice that the deviceId must be taken from the topic. The timestamp is not available in the body.
LineCross event
My camera offers this ‘line crossing’ event:
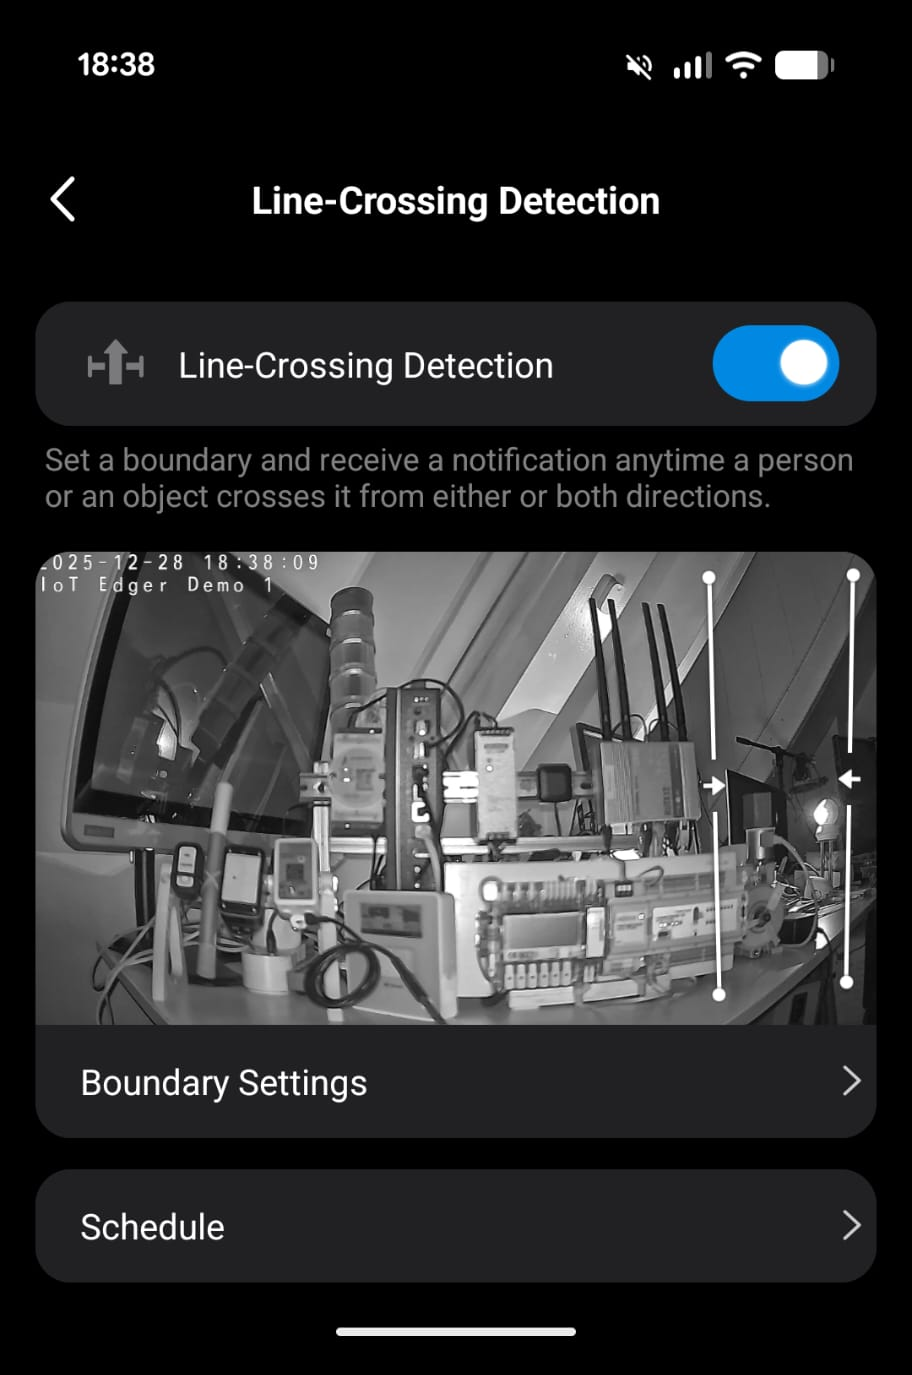
I set some boundaries to the right by adding two lines, just to show how it works.
The events follow shortly after I move into frame, from the right:
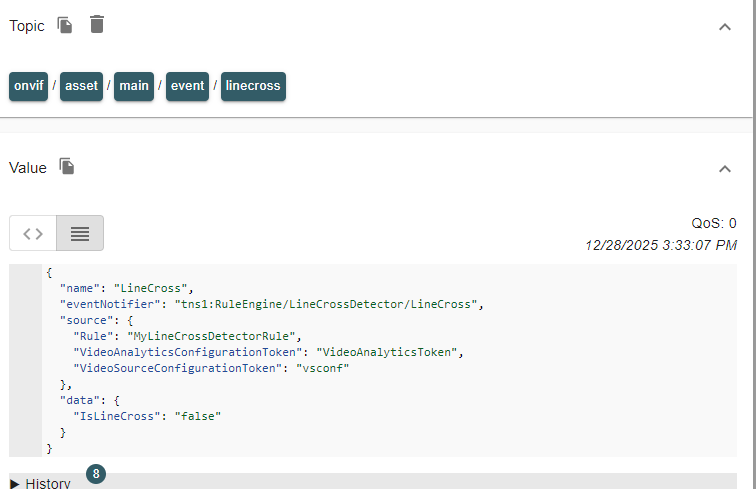
Events will be generated, both when a line is crossed and when a line is not crossed. It does not say which line is crossed, though.
Notice that the deviceId must be taken from the topic. The timestamp is not available in the body.
People event
The camera can also detect people. Think of faces and postures. This camera does not recognise actual persons by name:
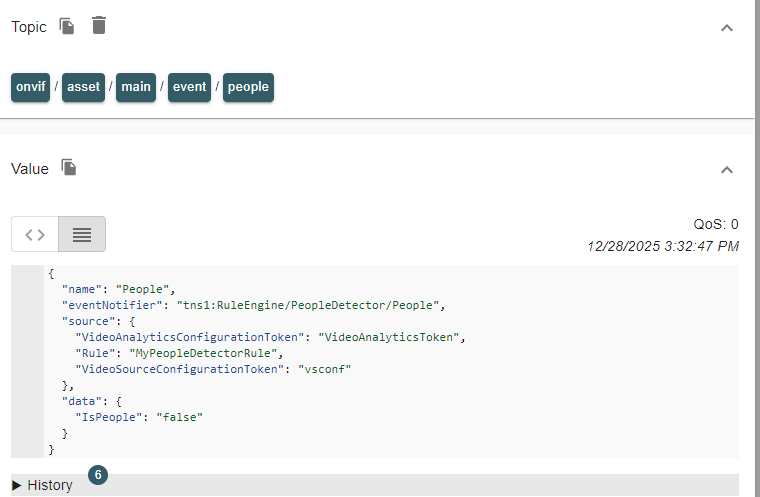
Events will be generated, both when people arrive in the frame and when they are not in the frame anymore.
Notice that the deviceId must be taken from the topic. The timestamp is not available in the body.
Tamper event
My camera also supports tamper events:
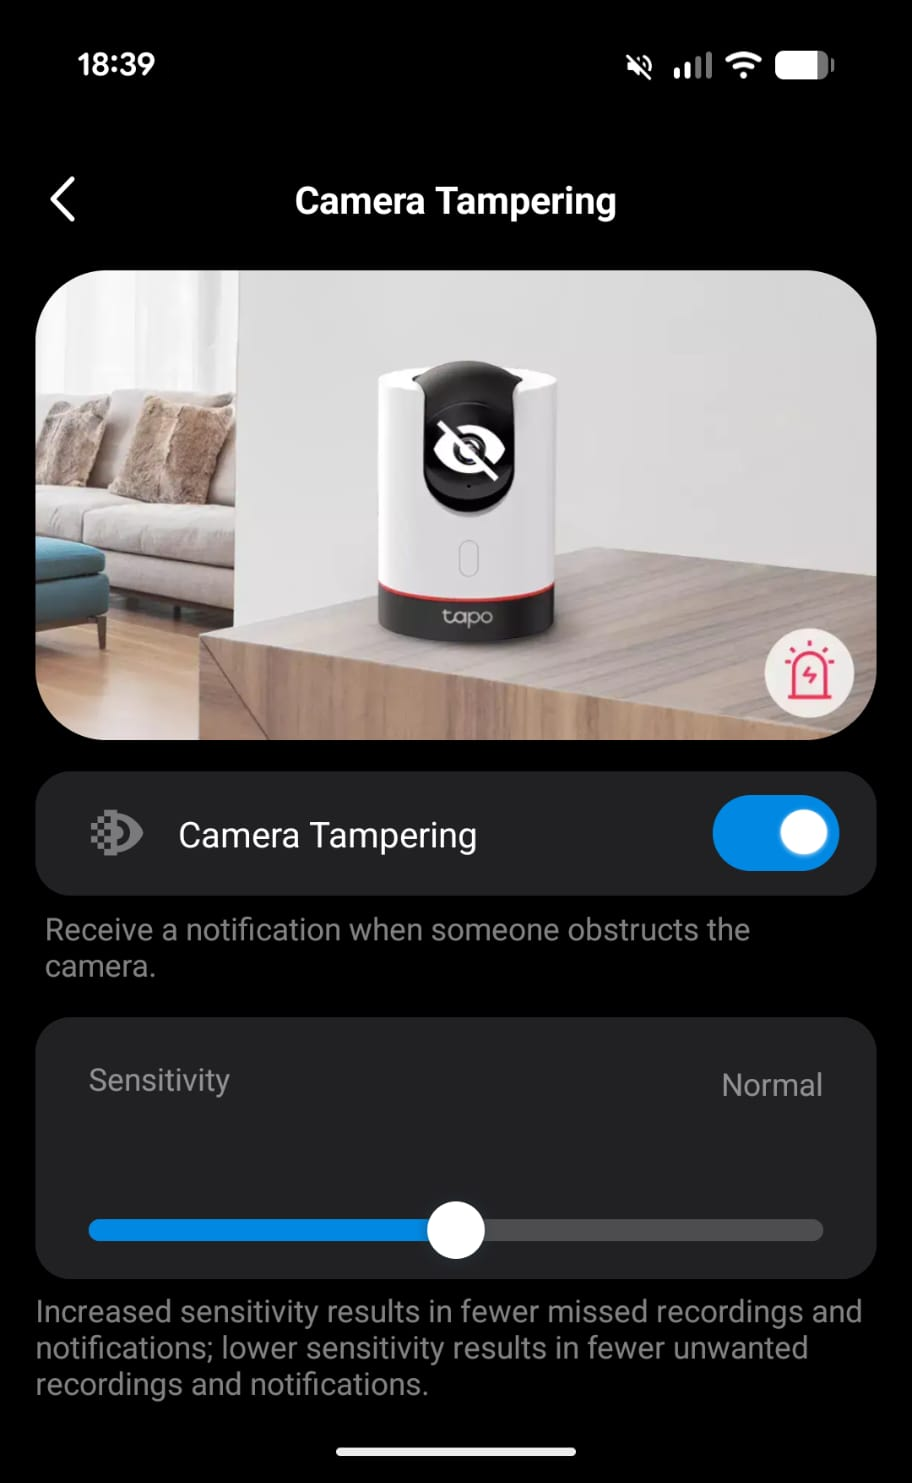
By blinding the camera or by covering it, the tamper event is raised:
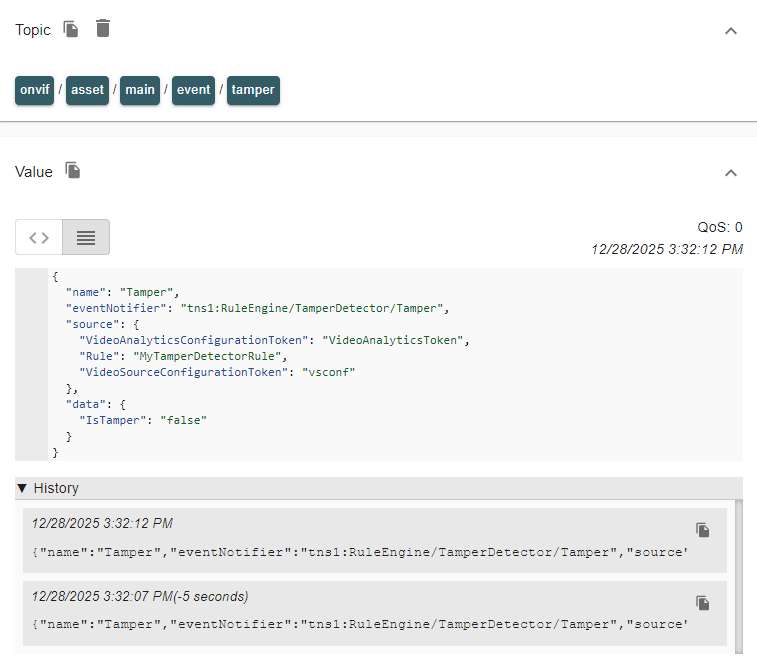
Events will be generated, both when tampering is started and when tampering ends.
Notice that the deviceId must be taken from the topic. The timestamp is not available in the body.
Conclusion
How about this? We are now alerted when people enter and exit my demo factory via an IP camera and Azure IoT Operations. Or when they cross the line from the secure area to the machine area? A notification is raised, ready to take action on.
All it takes to act on ONVIF camera events is some straightforward configurations within Azure IoT Operations.
We have learned how Azure IoT Operations supports the ONVIF protocol for IP cameras that expose an ONVIF endpoint, including authentication.
We have seen how MQTT topics can be set up for each separate ONVIF event.
Regarding the ONVIF actions (like pan, tilt, zoom), this is something for another blog post.
I love to read in the comments which IP camera you got connected to and what event notification arrived.
In the next post, those ONVIF line-cross events are used to create a local feedback loop towards a signal tower. For that, schema inferencing is needed. Check out the abilities of datasets and the JSON schema format.

12 gedachten over “Azure IoT Operations: Act on ONVIF camera events”
Reacties zijn gesloten.